理论推导
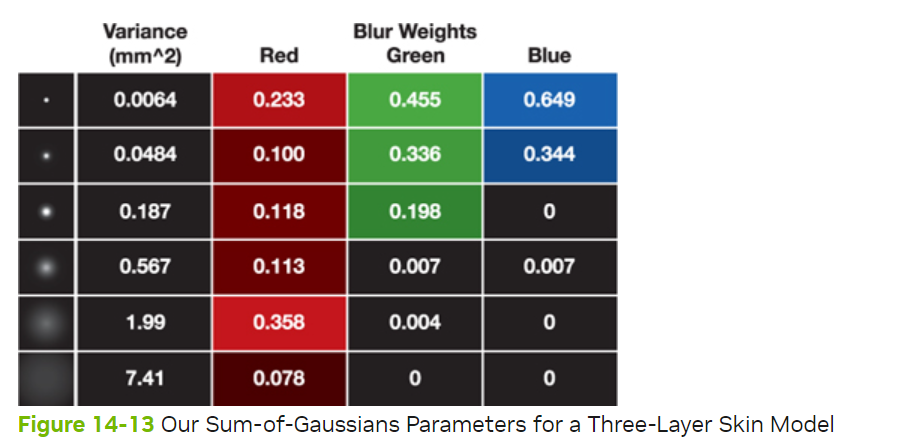
这里我们假定已经给定了Diffusion Profile(至于什么是Diffusion Profile和Pre-Integrated Skin的原理,参见我写的上篇文章),这里我直接拿Nvidia 《GPU Gems 3》给的一组 six Gaussians 的参数来测试。
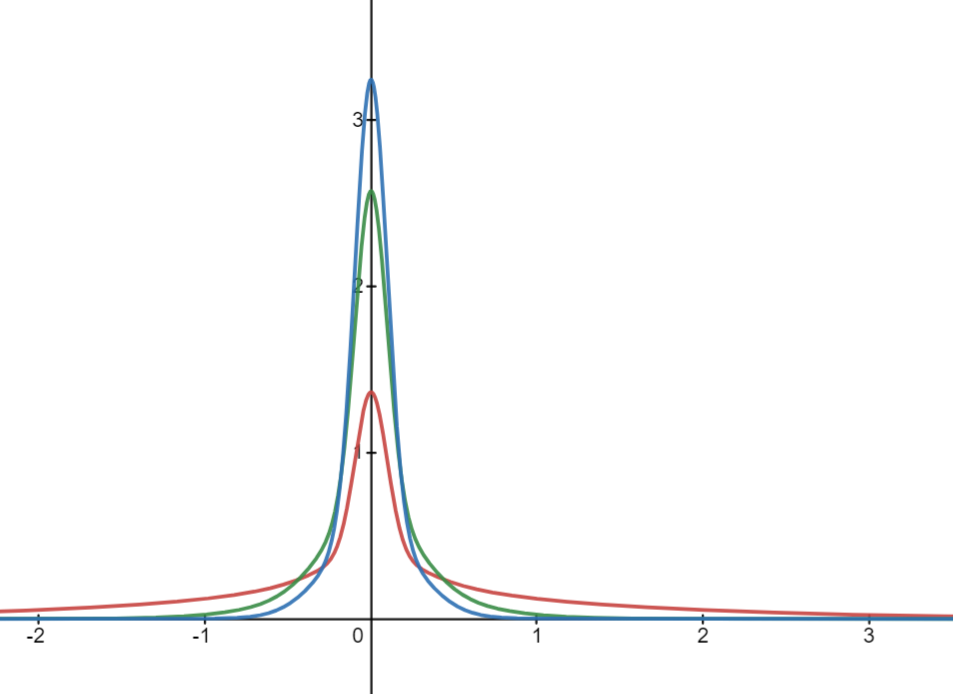
分享下自己做的图:https://www.desmos.com/calculator/luzmw9r0c1 , 结果图像如下:
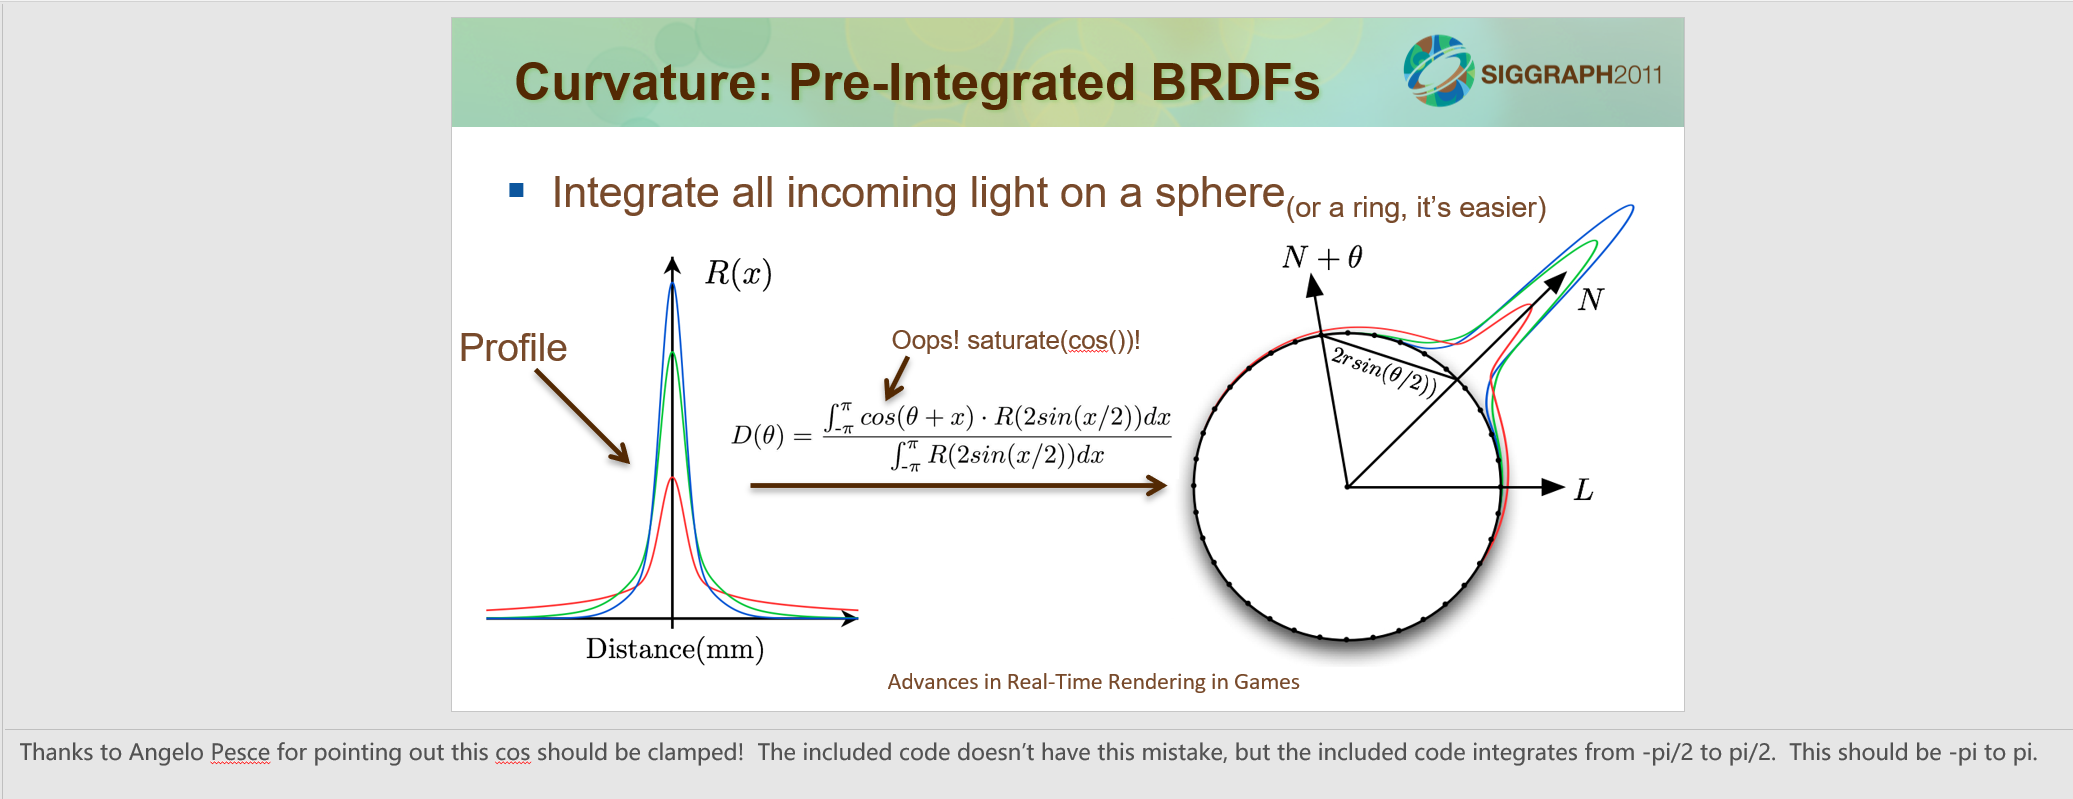
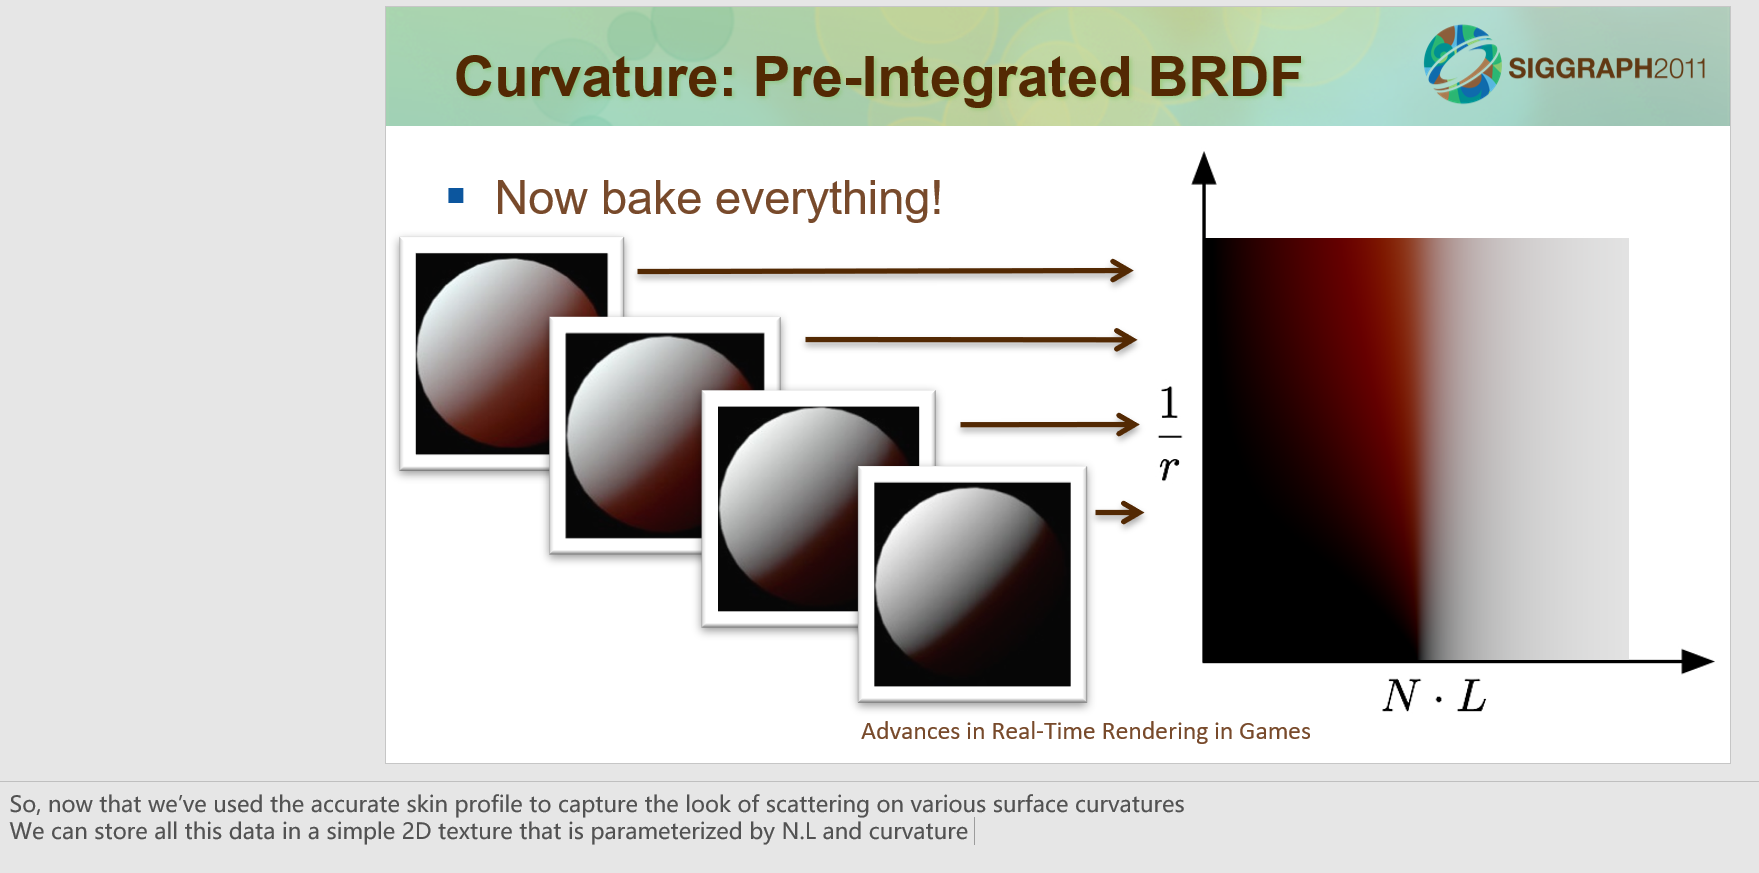
下图是SIGGRAPH PPT中用到的图:
可以看到我拿gpugems3的高斯参数算得的结果和siggraph给的差不多,同时,该作者也解释了真正的公式应当是什么和对应的积分区间,而且在圆环上的积分和球面上的积分是差不多的。

其中R(x)就是给定的Diffusion Profile。
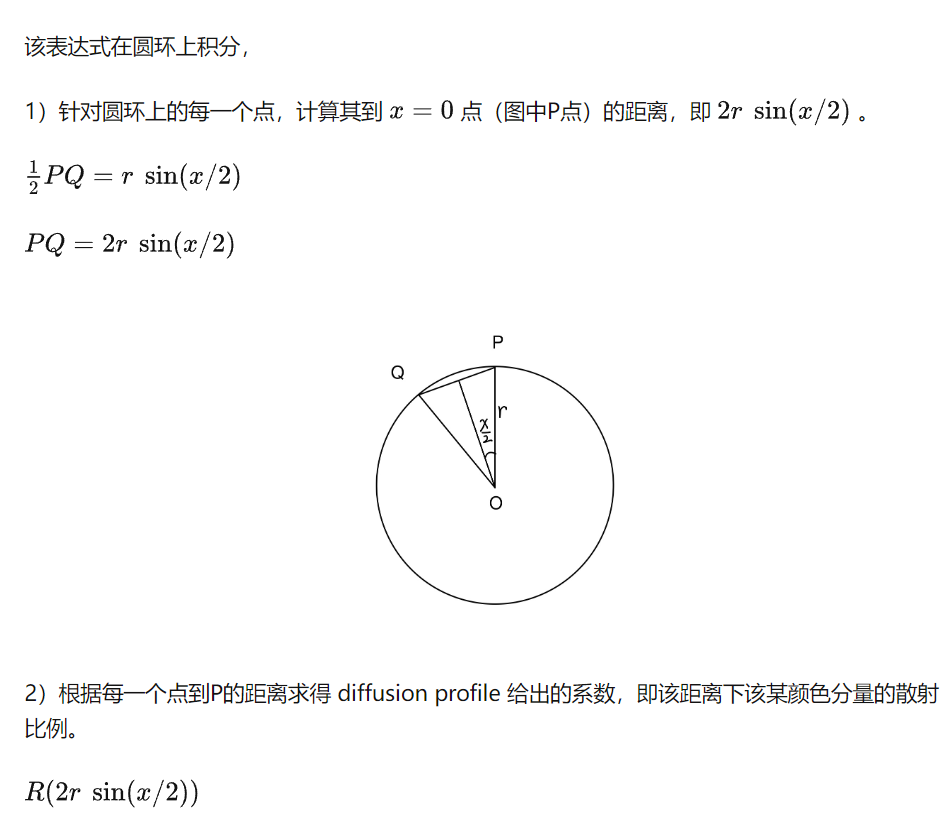
这个后面的解释过程我也搬运过来了。
后面的变换我倒觉得拿原作者PPT给的图也很好理解(当然引用文章对于变换的解释也不错)。
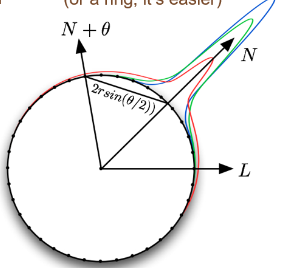
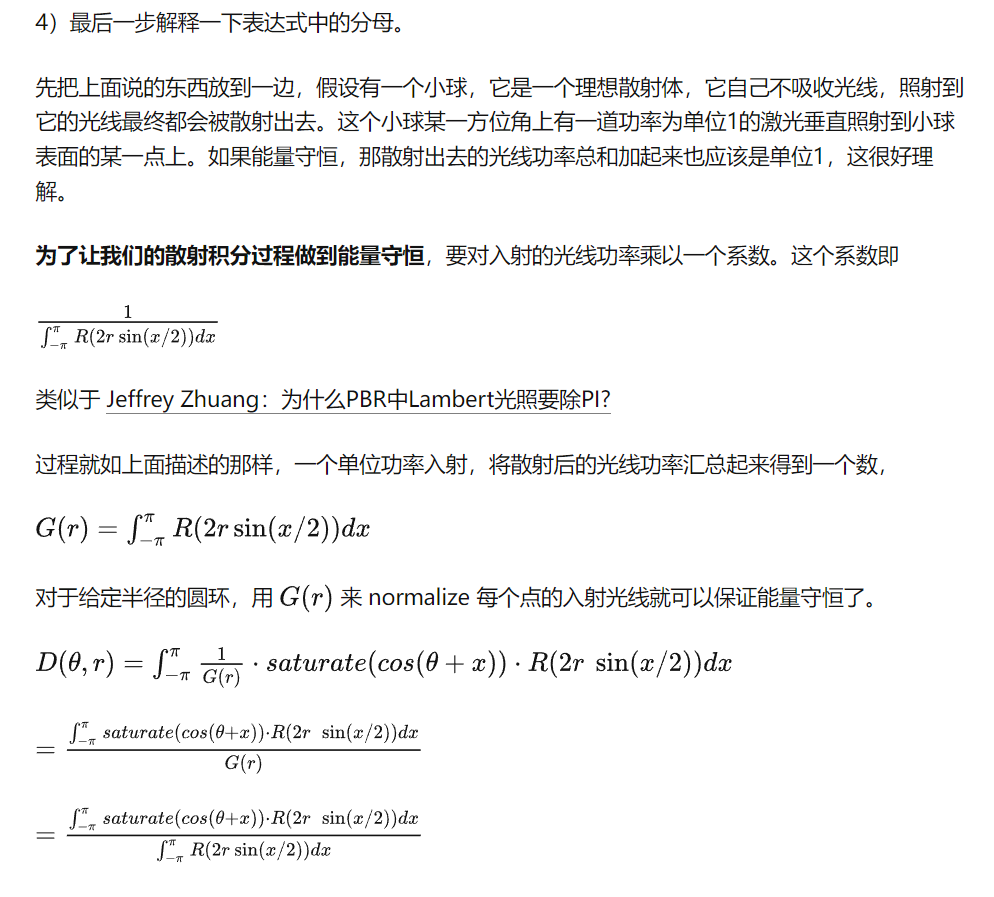
分母部分:
理论篇解释了这么多,我们尝试还原一下。
LUT生成
在Shadertoy上写了一下:https://www.shadertoy.com/view/mstGWs


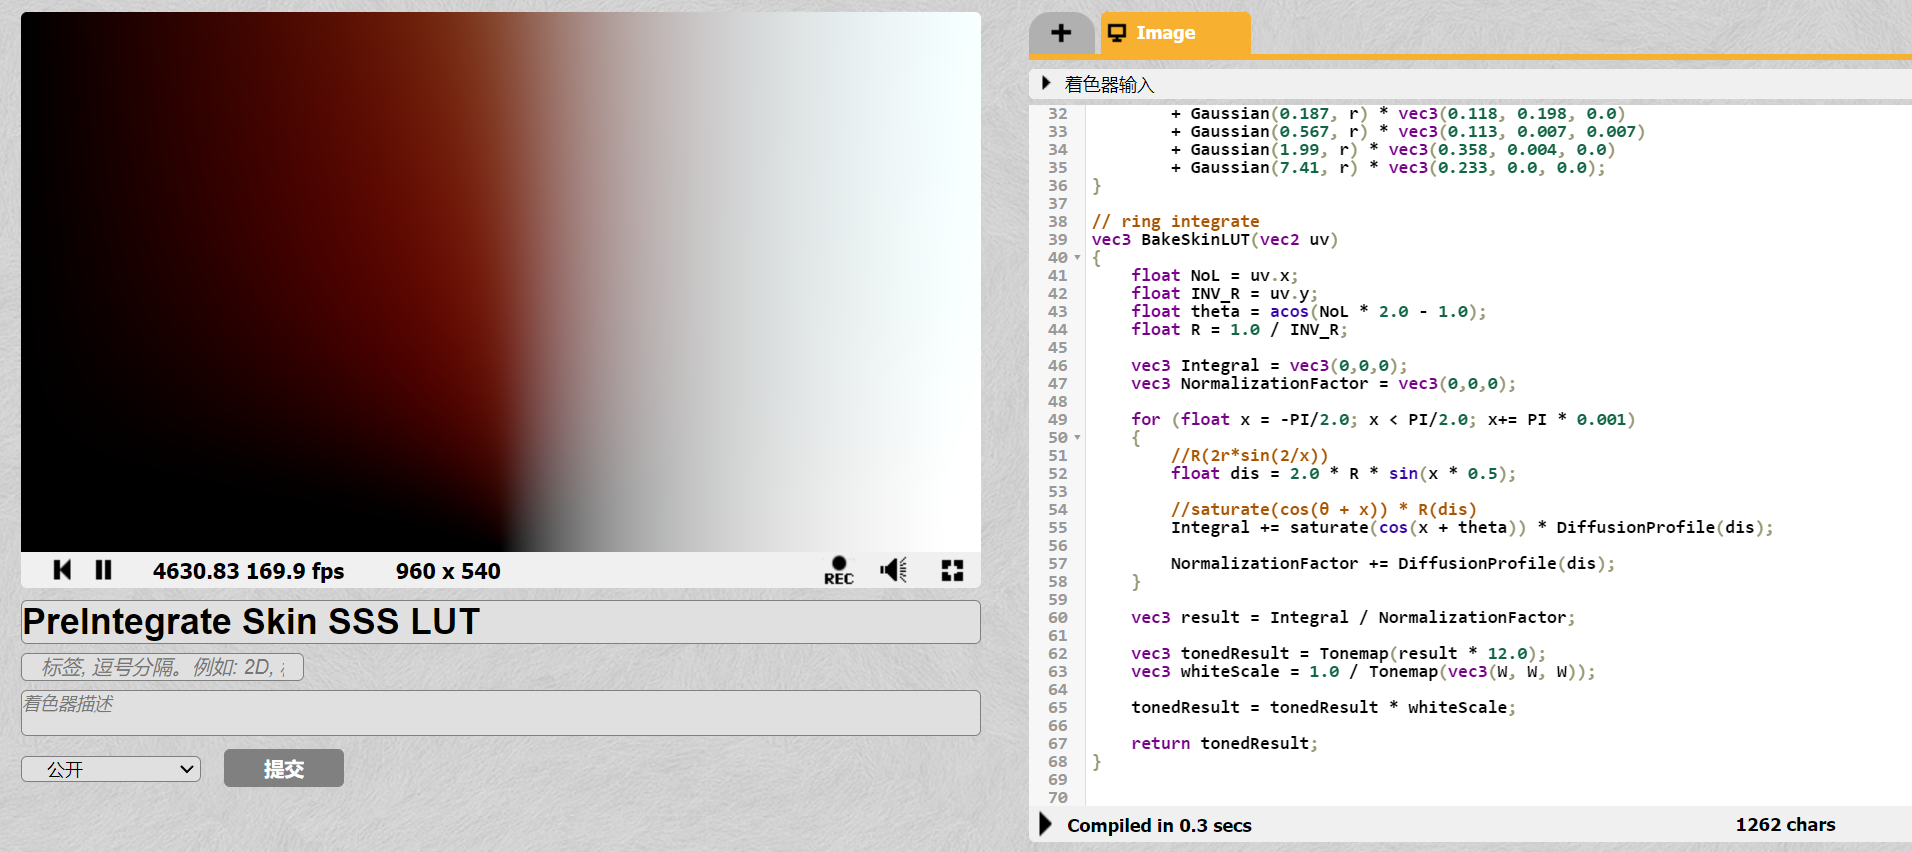
这里开启ToneMap,积分区间为半球区间是最接近原PPT效果的,实际上不用太纠结积分区间(不过作者提到正确的区间是(-PI,PI))和ToneMap的问题,因为这里的公式原本就是高度近似和简化后的结果,实时渲染讲究的是“近似的合理”而不是“合理的近似”。没有toneMap的话会有青色的区域,看文章评论区后亲自尝试着把Normalization函数换成了只有Red Channel,但是结果依然不好)
顺便在Unity里用Compute Shader写了个离线的生成工具。
